
在 PVE 中创建 Unraid 虚拟机并使用虚拟磁盘启动 Unraid 虚拟机
众所周知Unraid是需要通过U盘启动的,而且这个U盘必须有GUID,那么就没有办法在PVE里面用常规的虚拟磁盘启动。
实际上PVE的虚拟机是可以通过修改kvm参数来将虚拟磁盘挂载为USB设备的,但是这种方式挂载出来的U盘的GUID有问题,Unraid是不认的。
本文采用的方法是先在PVE宿主机内虚拟出一个U盘,再将这个虚拟U盘直通给虚拟机,通过这种曲线救国的方式可以在虚拟机启动Unraid并通过正版验证,缺点是只能启动一台Unraid虚拟机,PVE的计划任务不会自动备份这块磁盘,只能手动备份。
1. 创建虚拟磁盘
命令: fallocate -l 磁盘大小 存储路径
1 | # 示例 |
2. 安装内核模块
安装headers
1 | apt install apt install proxmox-headers-$(uname -r) |
安装git和make
1 | apt install git make |
克隆模块仓库
1 | git clone https://github.com/xairy/raw-gadget |
编译模块
1 | cd raw-gadget/dummy_hcd |
3. 加载模块
1 | cd raw-gadget/dummy_hcd |
4. 挂载虚拟磁盘为USB设备
示例
不要直接复制,看后面的参数说明
1 | modprobe g_mass_storage file=/root/virtual-usb/UNRAID.img idVendor=0x1919 idProduct=0x8100 iManufacturer="General" iProduct="USB Flash Disk" iSerialNumber=114514 |
参数解释:
| 参数 | 解释 | 备注 |
|---|---|---|
file |
虚拟磁盘路径 | 要写完整路径 |
idVendor |
虚拟USB设备的生产厂商ID | 0x+4位十六进制 |
idProduct |
虚拟USB设备的设备ID | 0x+4位十六进制 |
iManufacturer |
虚拟USB设备的生产厂商名称 | 随意 |
iProduct |
虚拟USB设备的产品名称 | 随意 |
iSerialNumber |
虚拟USB设备的序列号 | 小于等于12位的字母/数字 |
GUID
格式为生产厂商ID-设备ID-0000-大写序列号
序列号不足12位的会将序列号前面不足12位的部分填充为0,小写字母会被转为大写字母
例如示例中挂载USB磁盘的GUID为1919-8100-0000-000000114514
5. 创建Unraid启动盘
挂载虚拟磁盘后应该可以像正常U盘一样使用了,在PVE WebUI的磁盘管理可以看到这块盘,模型为File-Stor_Gadget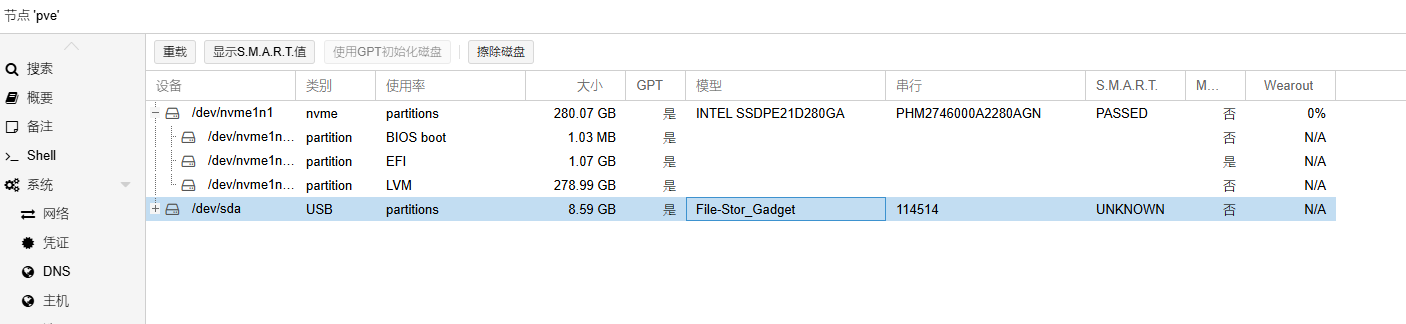
可以看到这块盘的路径是/dev/sda,我们需要对他分区
1 | root@pve:~# fdisk /dev/sda |
将/dev/sda1格式化为FAT32格式
1 | mkfs.vfat -F 32 /dev/sda1 |
设置分区卷标为UNRAID
1 | dosfslabel /dev/sda1 UNRAID |
挂载分区
1 | mkdir tmp |
安装unzip
1 | apt install unzip |
解压Unraid镜像到分区
1 | unzip unRAIDServer-6.12.10-x86_64.zip -d tmp |
卸载分区
1 | umount /dev/sda1 |
6. 创建Unraid虚拟机
正常创建一个虚拟机,操作系统选不使用任何介质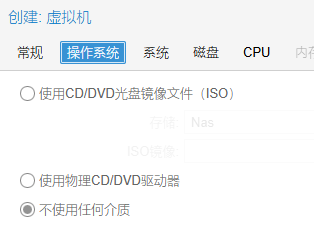
系统这里机型选q35,BIOS选UEFI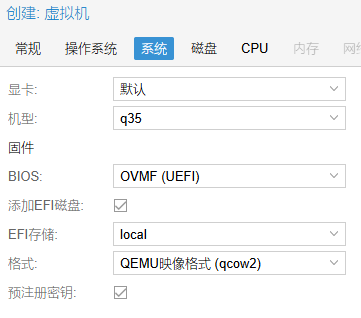
磁盘这里将默认磁盘删除,我们不需要创建启动磁盘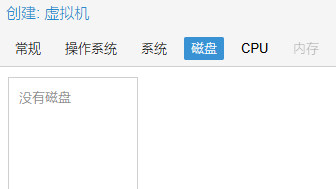
其余的按需求选,创建后添加一个USB直通设备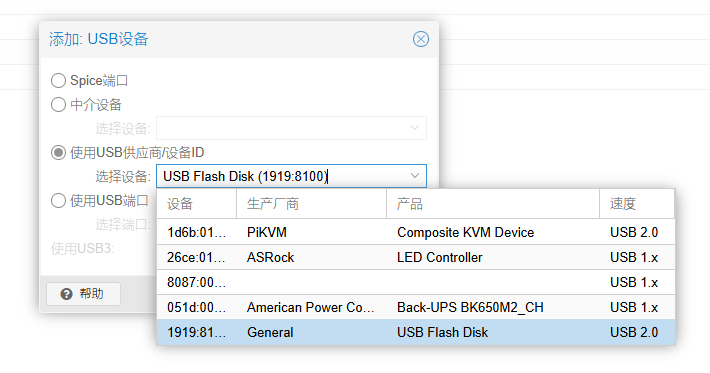
在引导顺序中勾选usb0,取消勾选ide2和net0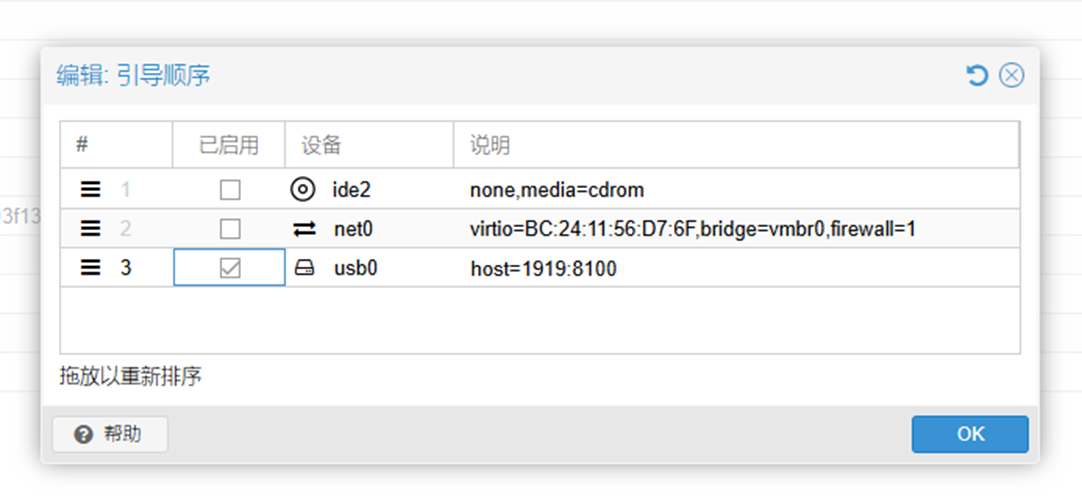
7. 关闭安全启动
在虚拟机控制台开机,在启动过程到这个界面时按Esc进入BIOS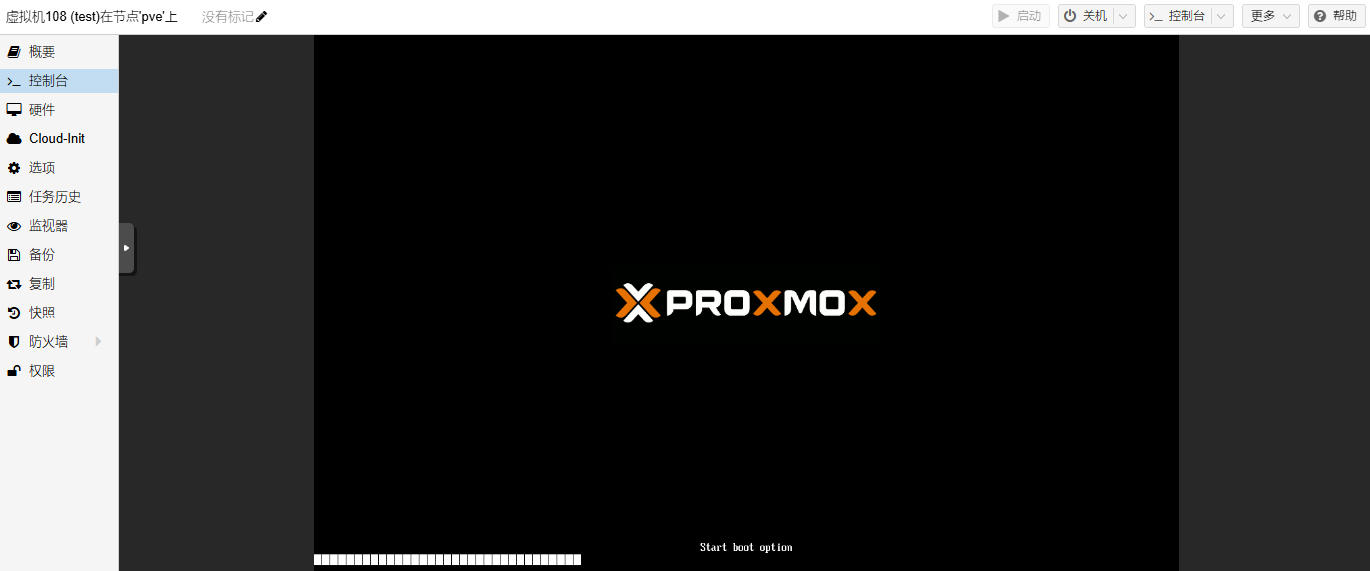
进入BIOS后,进入菜单Device Manager-Secure Boot Configuration,上下键移动光标到Attempt Secure Boot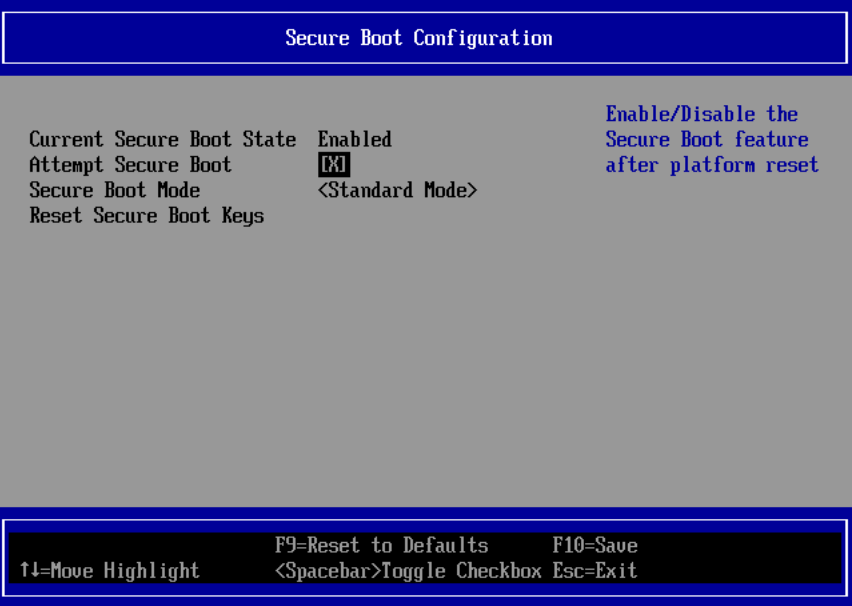
按空格键取消勾选,Esc关闭提示,F10保存,Y确认,两次Esc回到主界面,上下键移动光标到Reset,回车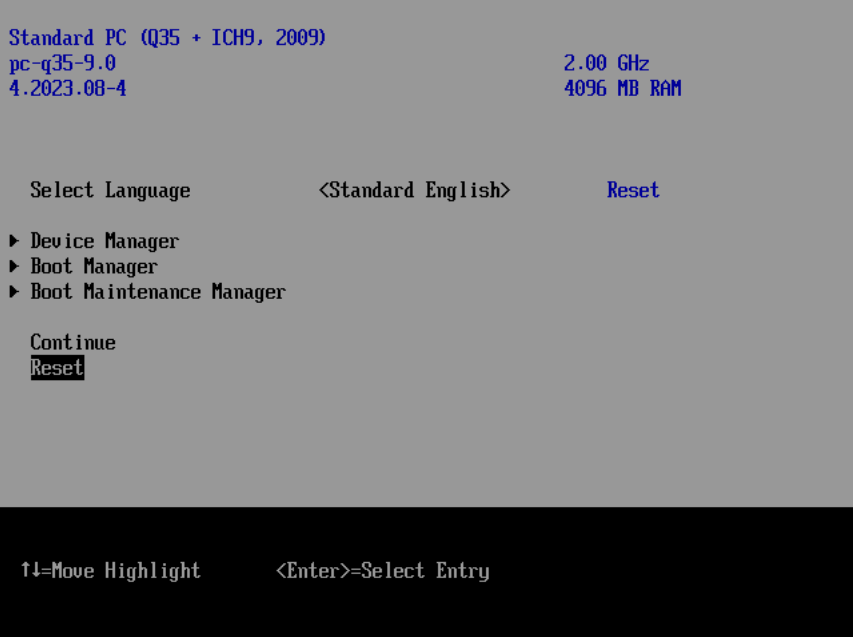
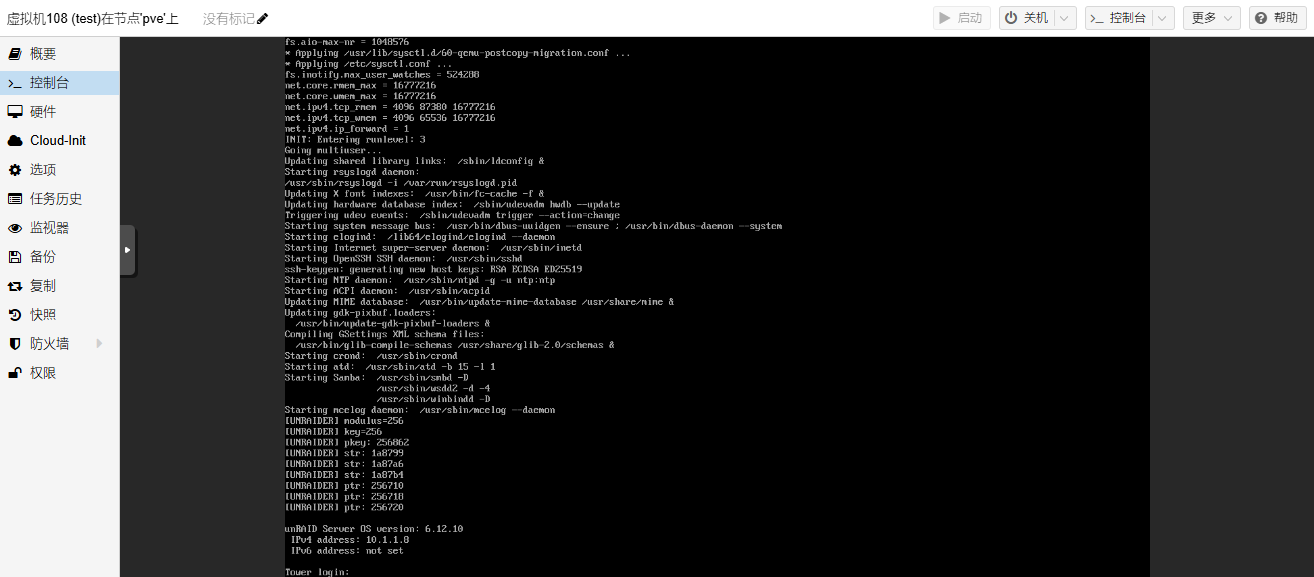
8. Unraid,启动!
9. 自动挂载虚拟磁盘为USB设备
以上方法在PVE重启后需要重新执行第3、4步,PVE更新或更换内核后需要重新执行第2步,不过我们可以给Unraid虚拟机设置钩子脚本实现自动化,在Unraid虚拟机启动时自动挂载虚拟磁盘为USB设备,在虚拟机关闭时卸载磁盘
创建钩子脚本,注意修改脚本里的参数
1 | cat > /var/lib/vz/snippets/mount_unraid_disk.sh << "EOF" |
赋予执行权限
1 | chmod +x /var/lib/vz/snippets/mount_unraid_disk.sh |
给对应虚拟机设置钩子脚本
1 | qm set 105 --hookscript local:snippets/mount_unraid_disk.sh |
再次启动虚拟机,脚本已经生效了